Našimi kurzy prošlo více než 10 000+ účastníků
2 392 ověřených referencí účastníků našich kurzů. Přesvědčte se sami
In this article we will see the creation of very simple macro in Excel.
Let’s say you do some process in Excel so often it is annoying. So you want to “teach” Excel the process and from this time it will be done automatically.
So you´ll say to Excel: “Look what I am doing. Next time you will do it yourself any time I click the button”.
Technically macro is an application created in Visual Basic for Applications language.
In this example we will create macro that performs very easy task – just cleans cells A1, A2, B1, B2. Macro will be triggered by button.
So when anyone clicks the button, the content of 4 cells will be deleted.
Well, I know this is not practical, but we can describe the basic principle of macro on it.
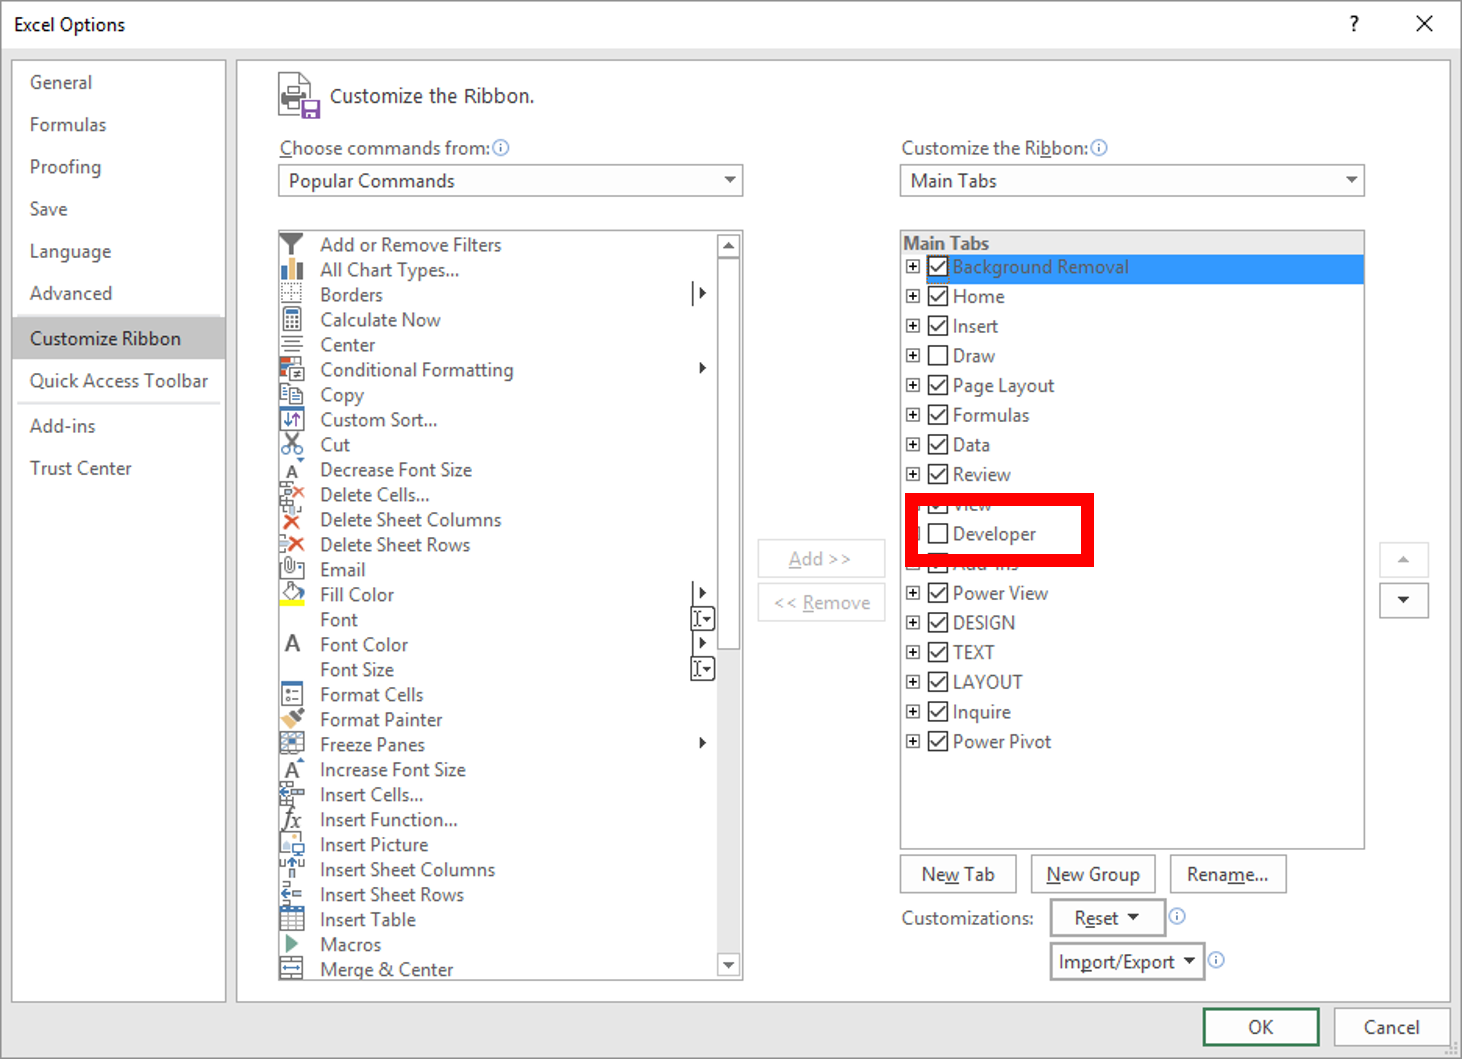
To work with macros, you need the Developer ribbon in Excel. To show it, go to File / Options / Customize ribbon and check Developer.
Now you can see the Developer ribbon.
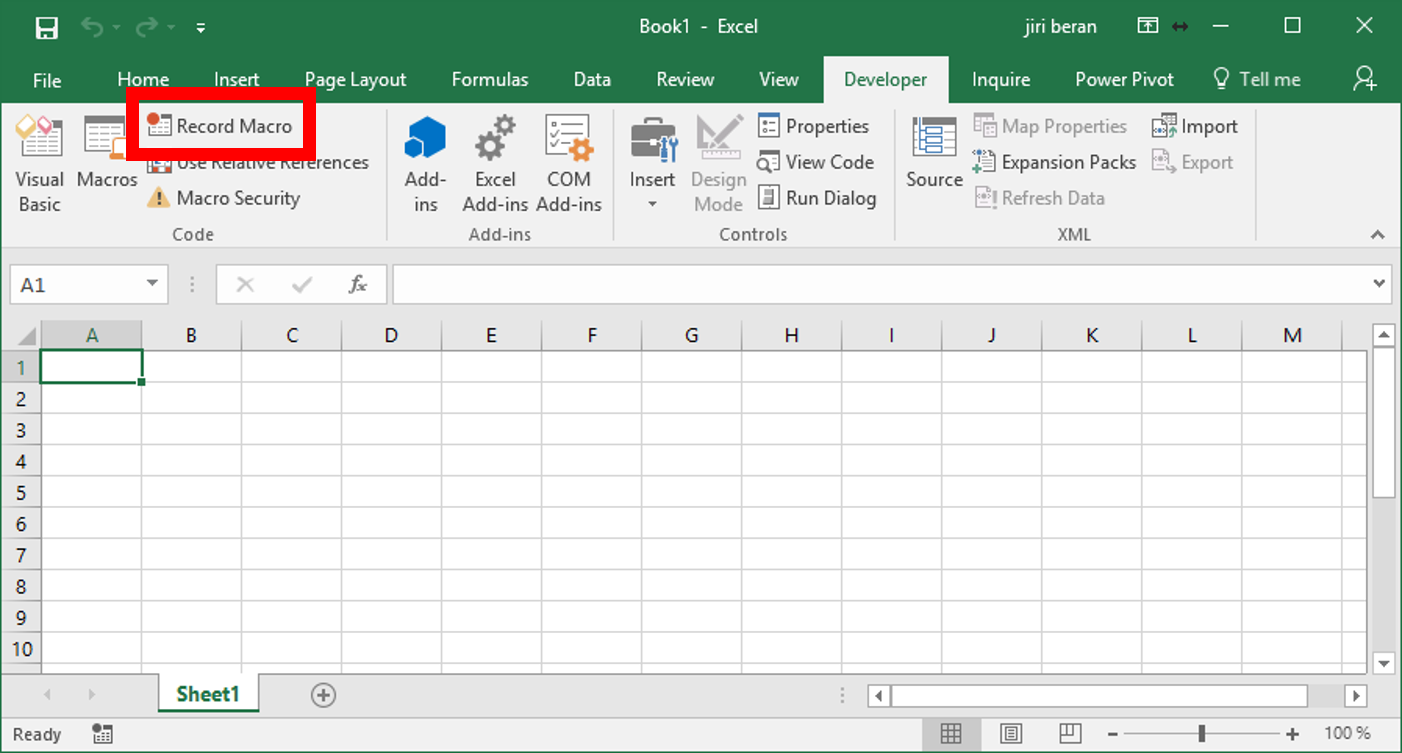
Now it is possible to record macro – in another words we will do what we want to automatize.
Click on “Record macro”.
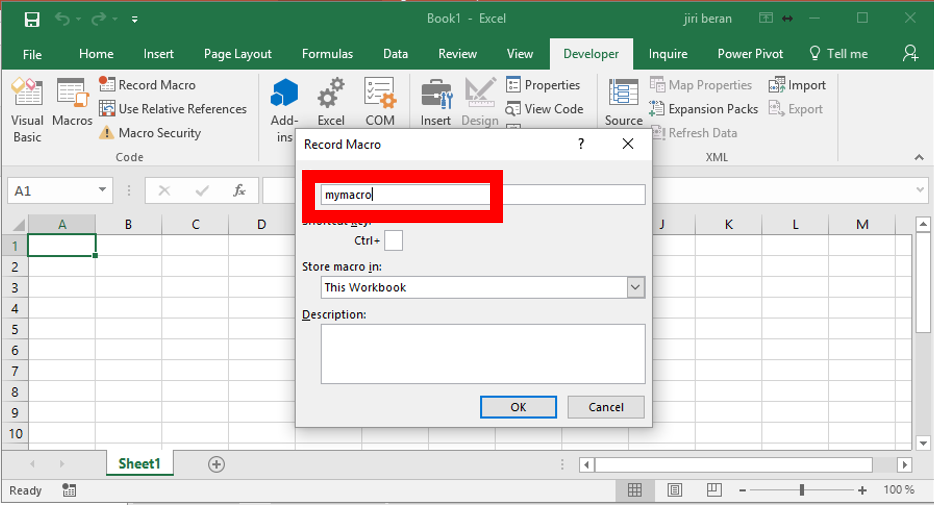
We can give some name to the macro (spaces are not allowed).
Click “OK”.
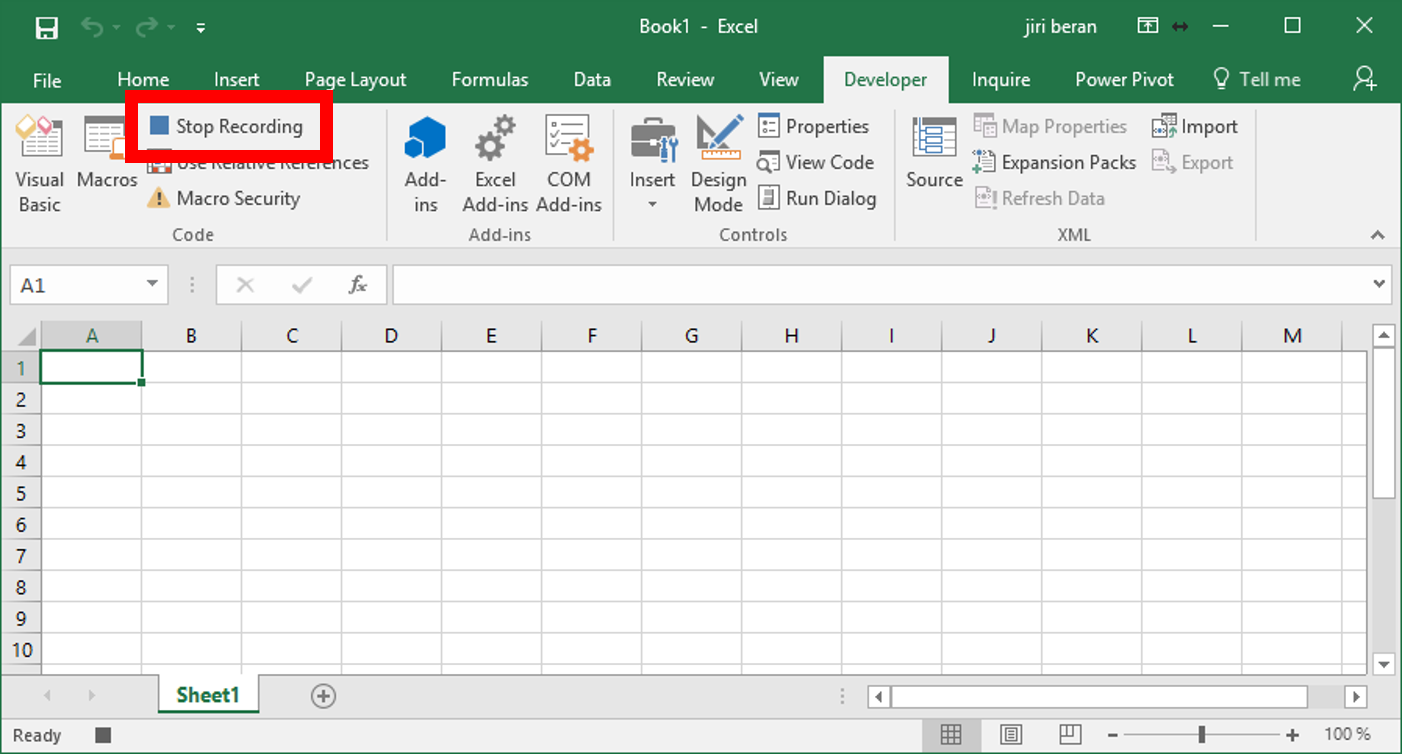
Now the button “Record macro” was changed to “Stop recording”. It means Excel is “observing” what we are doing.
Now we will select the four cells and press “Delete”.
Click “Stop recording” and the macro is finished.
You can see the list of them when going to “Macros”.
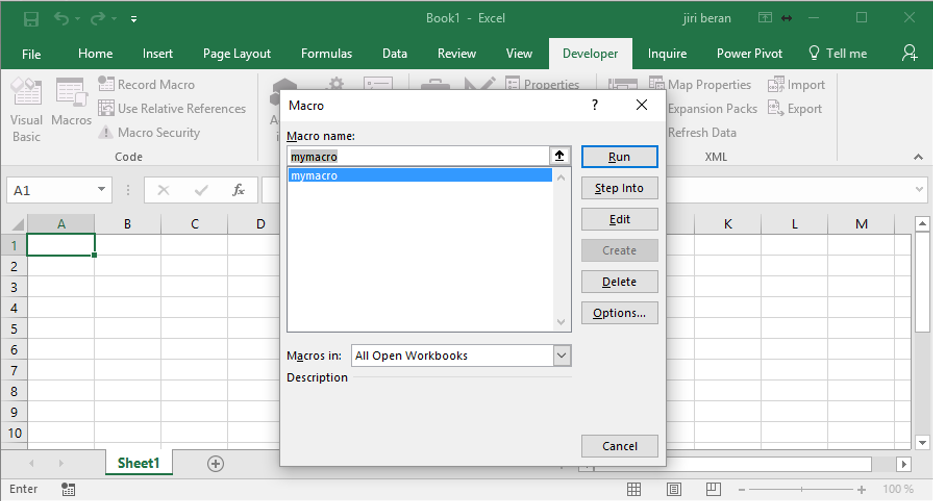
We can run the macro by “Run” button. It will clean the content from 4 cells.Try it.
Type something to the cells and run macro. If recorded properly, everything will be erased.
We are nearly finished, just need to add the button.
We will insert it:

Click and enlarge it in sheet. Excel proposes the list of macros automatically. So select it only and click “OK”.
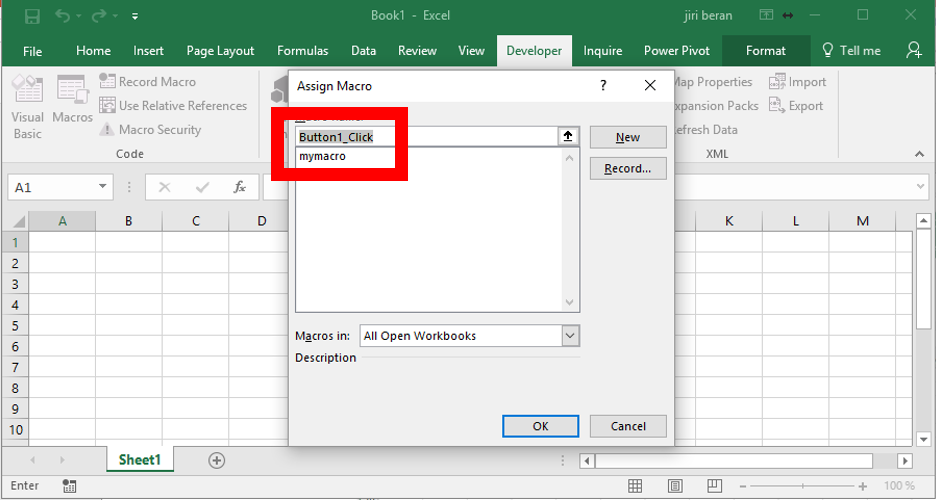
That’s all, you can try whether the button works.
But how does the code of macro look?
We can see it when going to Macros / Edit.
Sub vyukaexcelu()
' mojemakro
    Range("A1:B2").Select
    Selection.ClearContents
End Sub
The third and fourth rows are most important. The third one select the area and the fourth one removes the content from them.
![]()
![]()
Pište kdykoliv. Odpovíme do 24h
![]()
© exceltown.com / 2006 - 2023 Vyrobilo studio bARTvisions s.r.o.